Understanding Text-to-Image vs Image Editing Modes
Learn the differences between text-to-image generation and image editing modes in Gemini Photo. Choose the right mode for your creative needs.
Understanding Modes: Text-to-Image vs Image Editing
Gemini Photo offers two powerful modes for creating and transforming images. Understanding when to use each mode will help you achieve the best results for your creative projects.
Overview of Modes
Text-to-Image Mode
Generate entirely new images from text descriptions. This mode creates images from scratch based solely on your prompt.
Image Editing Mode
Transform existing images by applying AI-powered edits using text prompts. Upload your images and describe the changes you want.

Text-to-Image Mode
What It Does
Text-to-image generation creates new images from scratch using only your text description. The AI interprets your prompt and generates a completely original image.
When to Use Text-to-Image
- Creating original artwork or designs
- Generating images for concepts that don't exist yet
- Exploring creative ideas without source material
- Creating illustrations, graphics, or digital art
- Generating images for presentations or content
How It Works
- Enter a descriptive text prompt
- The AI model (Nano Banana) interprets your description
- A new image is generated based on your prompt
- Download or save your creation
Example Use Cases
Creative Projects
Prompt: "A futuristic cityscape at night, neon lights, cyberpunk style, detailed"
Marketing Materials
Prompt: "Modern office workspace, professional photography, bright and welcoming"
Artistic Expression
Prompt: "Abstract painting with bold brushstrokes, vibrant colors, expressionist style"
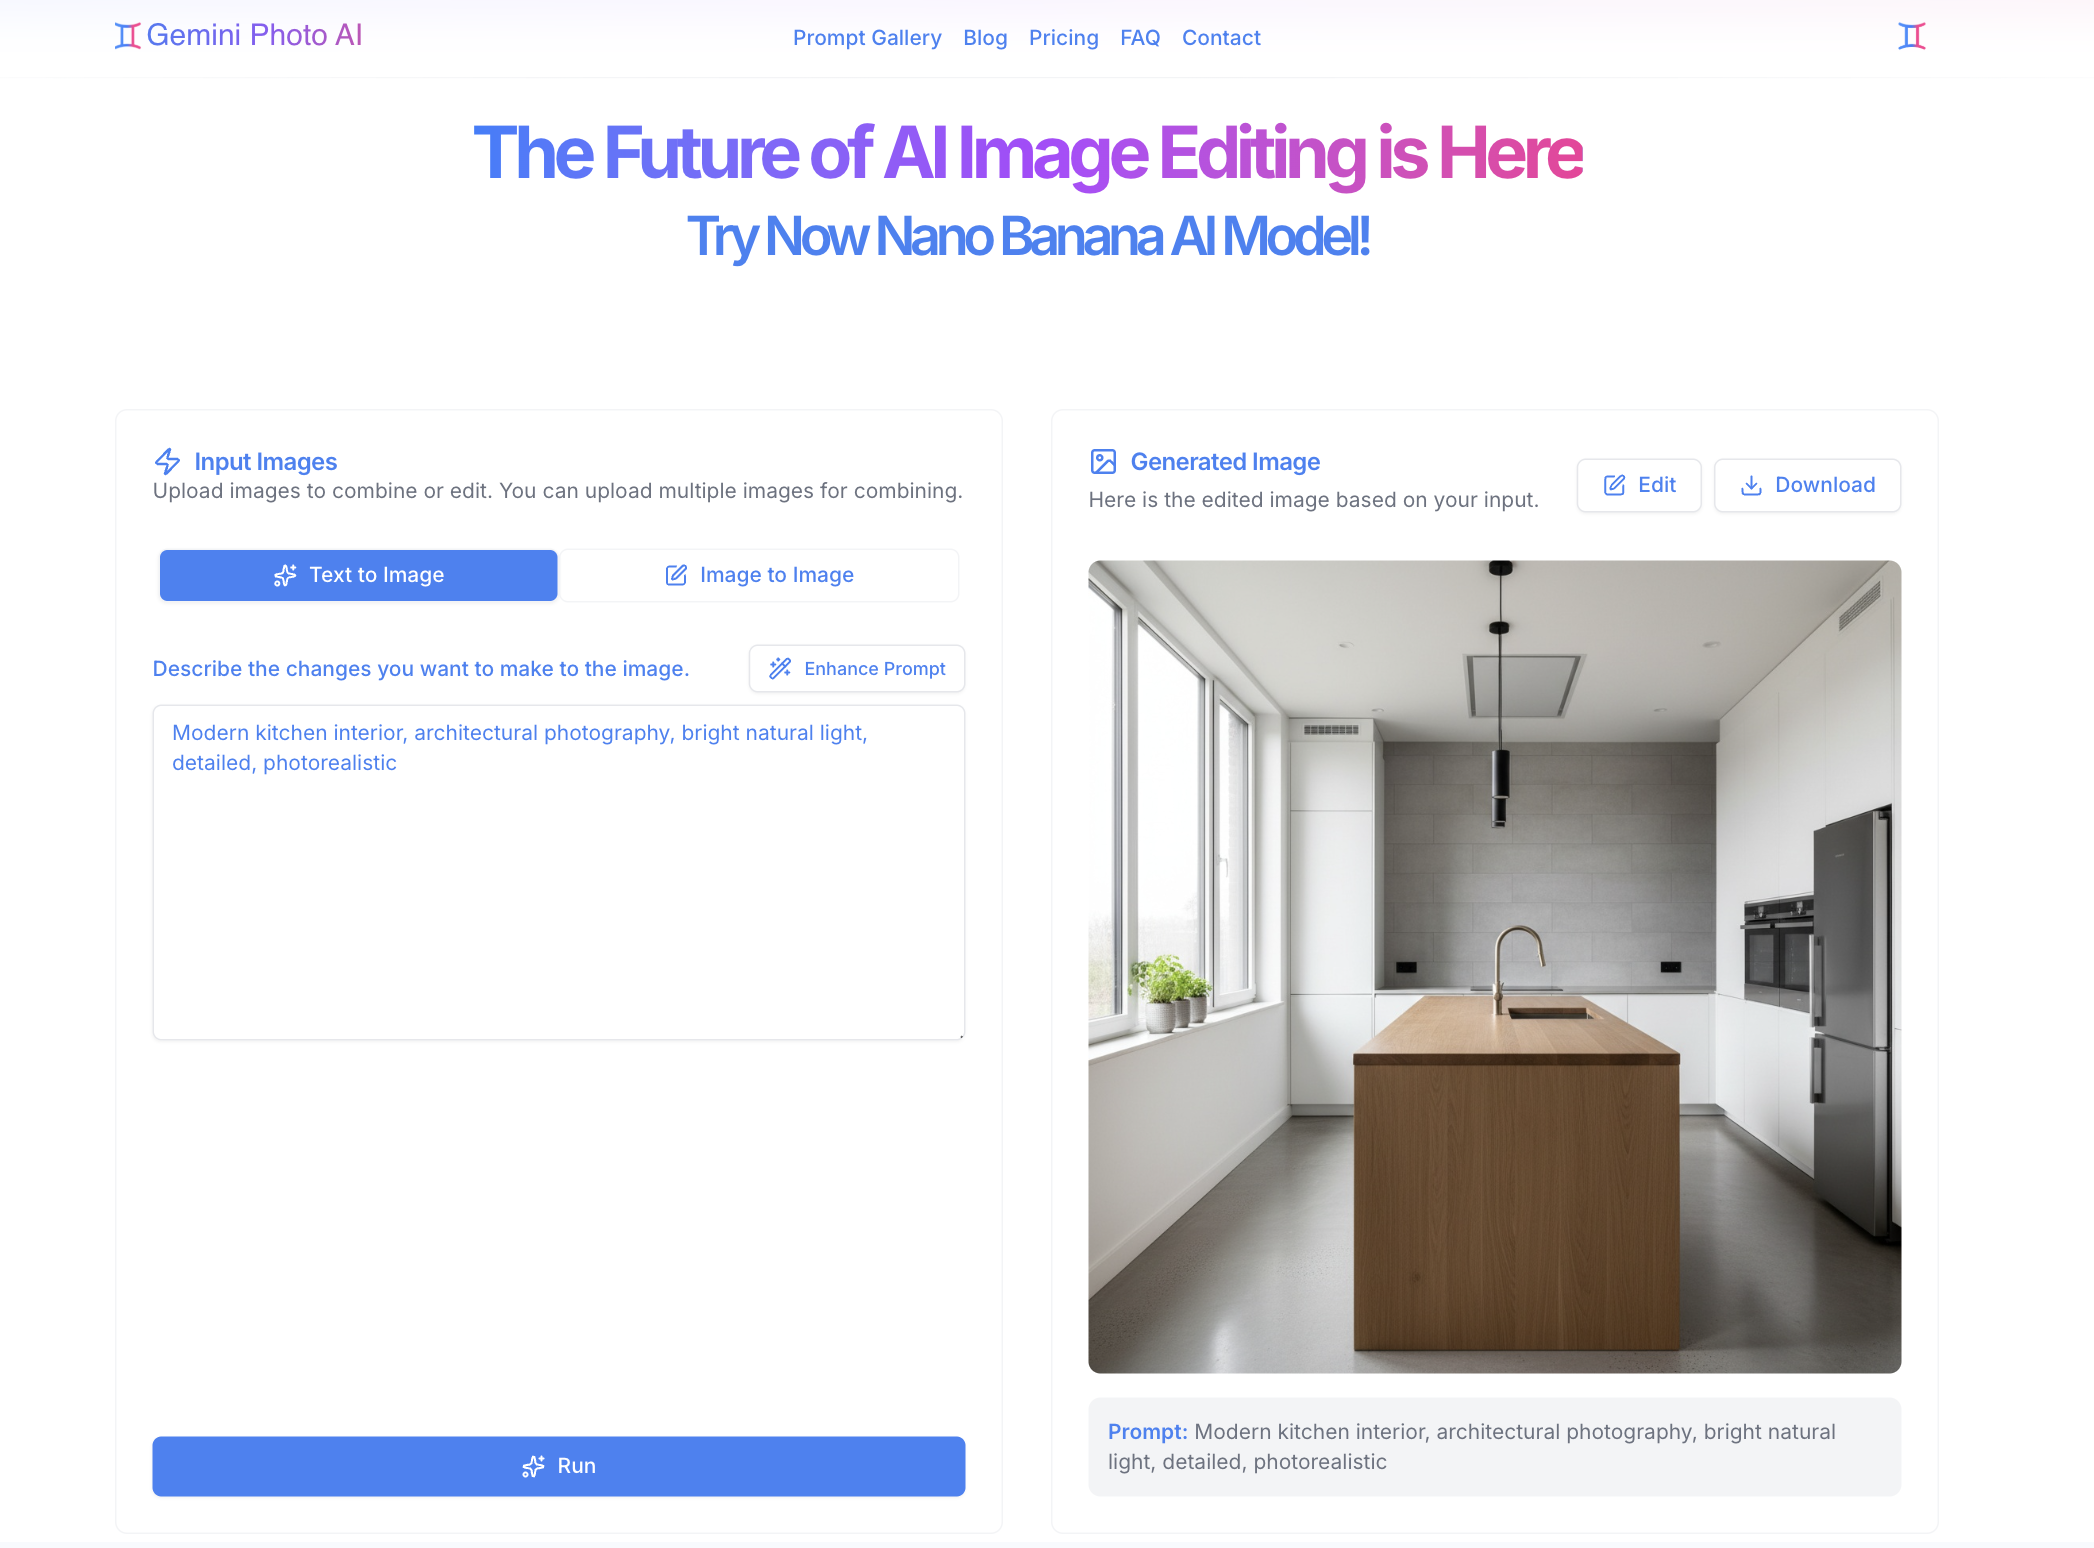
Image Editing Mode
What It Does
Image editing mode allows you to transform existing images by describing the changes you want. Upload one or two images and use prompts to modify them.
When to Use Image Editing
- Enhancing existing photographs
- Removing or adding objects to images
- Changing backgrounds or environments
- Adjusting lighting, colors, or style
- Combining elements from multiple images
- Retouching portraits or product images
How It Works
- Upload one or two images (file or URL)
- Enter a prompt describing the edits you want
- The AI applies your requested changes
- Review and download the edited image
Example Use Cases
Background Replacement
Upload: Portrait photo
Prompt: "Replace the background with a beach sunset scene"
Object Removal
Upload: Photo with unwanted objects
Prompt: "Remove the person in the background, keep everything else natural"
Style Transfer
Upload: Regular photo
Prompt: "Transform into watercolor painting style, soft colors, artistic"
Dual Image Editing
Upload: Two images
Prompt: "Combine the style of the first image with the subject of the second"
Key Differences
Input Requirements
| Feature | Text-to-Image | Image Editing |
|---|---|---|
| Text Prompt | Required | Required |
| Source Image | Not needed | Required (1-2 images) |
| Image Upload | No | Yes (file or URL) |
Output Characteristics
| Aspect | Text-to-Image | Image Editing |
|---|---|---|
| Originality | Completely new | Based on source image |
| Control | Full creative freedom | Constrained by source |
| Speed | Fast generation | Slightly longer processing |
| Use Case | Creation | Transformation |
Technical Differences
Text-to-Image:
- Uses the full creative capacity of the AI model
- No constraints from existing imagery
- Can generate any style or subject
- Best for original concepts
Image Editing:
- Works within the framework of your source image
- Maintains elements you want to keep
- Applies targeted modifications
- Best for enhancing existing images
Choosing the Right Mode
Use Text-to-Image When:
- ✅ You want to create something completely new
- ✅ You don't have source images
- ✅ You're exploring creative concepts
- ✅ You need original artwork or graphics
- ✅ You want full creative control
Use Image Editing When:
- ✅ You have existing images to enhance
- ✅ You want to modify specific elements
- ✅ You need to maintain certain aspects of an image
- ✅ You're retouching or improving images
- ✅ You want to combine multiple images
Mode Switching Guide
How to Switch Modes
- In the image editor interface, locate the mode selector
- Click "Text-to-Image" or "Image Editing"
- The interface will update for the selected mode
- Enter your prompt (and upload images if editing)
Tips for Mode Selection
- Start with Text-to-Image if you're unsure—it's simpler to begin
- Use Image Editing when you have specific images to work with
- Experiment with both to understand their capabilities
- Combine workflows: Generate with text-to-image, then edit the result
Advanced Techniques
Hybrid Workflow
- Generate a base image using text-to-image
- Switch to image editing mode
- Upload your generated image
- Apply additional edits with prompts
Iterative Editing
- Start with image editing
- Save your result
- Use the edited image as input for another edit
- Build up your desired result through multiple passes
Common Questions
Can I use both modes in one session?
Yes! You can switch between modes at any time. Many users generate images with text-to-image, then refine them with image editing.
Which mode produces better results?
Both modes are powerful. The "better" mode depends on your goal:
- Text-to-image: Best for original creation
- Image editing: Best for enhancing existing images
Can I edit a text-to-image result?
Absolutely! Generate an image with text-to-image, then switch to image editing mode and upload your generated image for further modifications.
Do I need different prompts for each mode?
Yes, slightly. Text-to-image prompts describe what to create. Image editing prompts describe what to change. For example:
- Text-to-image: "A red sports car on a mountain road"
- Image editing: "Change the car color to blue and add snow to the mountains"
Next Steps
Now that you understand the modes:
Experiment with both modes to discover which works best for your creative projects!